
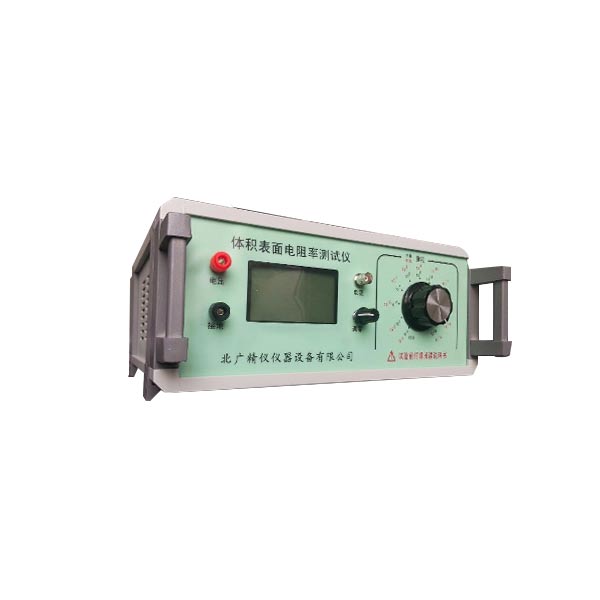
塑料表面体积电阻率测量仪 标准配置:
1,测试仪器:1台
2,电源线:1条
3,测量线:3根(屏蔽线,测试接线,接地线)
4,使用说明书:1份
注:本仪器配不同的测量电极(夹具)可以测量不同材料不(固体、粉体或液体)的体积电阻率和表面电阻率或电导率
塑料表面体积电阻率测量仪 技术要求
01电阻测量范围1?104Ω ~1?1018 Ω
02电流测量范围2?10-4A ~1?10-16A
03显 示 方 式数字液晶显示
04内置测试电压10V 、50V、100V、250、500、1000V(任意切换)
05基本准确度1% (*注)
06使用环境温度:0℃~40℃,相对湿度<80%
07供电形式AC 220V,50HZ,功耗约5W
08仪器尺寸285mm? 245mm? 120 mm
09仪器质量约5KG
10仪器可连续工作 8 小时
典型应用
1、测量绝缘材料电阻(率)
2、测量防静电材料的电阻及电阻率
3、测量计算机房用活动地板的系统电阻值
4、测量防静电鞋、导电鞋的电阻值
5、光电二极管暗电流测量
6、物理,光学和材料研究
应用范围:
a 材料高阻测试测量如防静电产品(防静电鞋、防静电塑料橡胶制品、计 算机房防静电活动地板等)电阻值的检测;
b 材料体积电阻(率)和表面电阻(率)测量;
c 电化学和材料测试,以及物理,光学和材料研究;
d 微弱电流测量如光电效应和器件暗电流测量。
使用说明
(一)应满足下例要求:
1、测试电压范围应包括:100V~500V
2、测量范围应包括:1?106Ω~1?1017Ω
3、阻值大于1012Ω时,测量误差应小于?20%,阻值不大于1012Ω时,测量误差应小于?10%。
4、输入接线的绝缘电阻应大于仪器输入电阻的100倍。
5、测试时试样及测量导线应有良好。
6、仪器应定期进行校验。
(二)准备工作:
1、取被测液体(如:增塑剂)试样50ml。
2、试样应在温度23?2℃,相对湿度65?5%的条件下处理2小时以上。
(三)测试步骤:
1、测试温度23?2℃,相对湿度65?5%,无外界电磁场干扰环境中进行。
2、测试时对试样所加电压为100V~500V的直流电压,选择电压档次。
3、将试样倒入高压电极内,使液面刚好和环电极下缘全部接触为止。
4、将充分放电后的试样和电极,按固体(液体)体积及表面电阻率测试仪要求接线。
外电极(高压电极)接高固体(液体)体积及表面电阻率测试仪的高压输出端。
内电极(测量电极)接固体(液体)体积及表面电阻率测试仪的测量端。
中电极(环电极)接固体(液体)体积及表面电阻率测试仪的接地端。
5、仪器预热30分钟,稳定后调整仪器(调零),加上试验1分钟,读取电阻指示值,然后放电1分钟,再测试一次,以二次的算术平均值作为试验样品电阻指示值。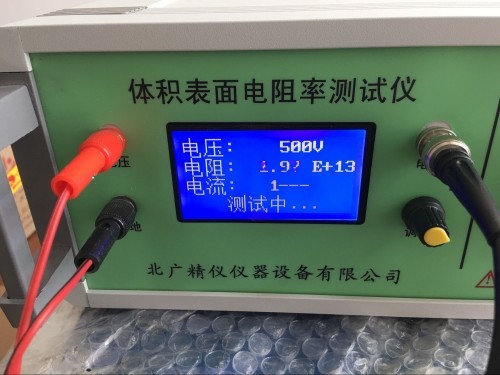
(四)计算方法:
按式(1)计算体积电阻系数(pv),计算结果取二位有效数字。
(五)注意事项:
1、测定电极必须放置在高绝缘的垫板上。
2、测定电极在测试前后,均应做好清洗工作,特别是三只电极的支撑件不得受到试样的污染
使用注意事项
高阻测量一定要严格按使用方法步聚进行,否则有可能造成仪器永久损坏或电人。
1 应在“Rx”两端开路时调零(主机开机)
如接在电阻箱或被测量物体上时调零后测量会产生很大的误差。一般一次调零后在测试过程中不需再调零,但改变测量电压后可能要重新调零。
2 禁止将“Rx”两端短路,以免微电流放大器受大电流冲击
3 在测试过程中不要随意改动测量电压,
随意改动测量电压可能因电压的过高或电流过大损坏被测试器件或测试仪器,而且有的材料是非线性的,即电压与电流是不符合欧姆定律,有改变电压时由于电流不是线性变化,所以测量的电阻也会变化。
4 测量时从低次档逐渐拔往高次档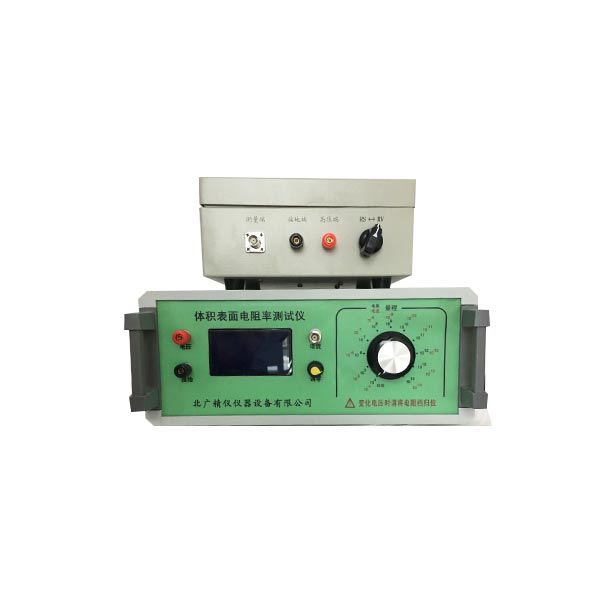
每拨一次稍停留1~2秒以便观察显示数字,当有显示值时应停下,记录当前的数字即是被测电阻值。若显示“1”时,表示欠量程应往高次档拔。直到有显示数字时为止。当有显示数字时不能再往高次档拨,否则有可能损坏仪器(机内有过电流保护电路)。除104 Ω档之外,当显示低于1.99,表示过量程应换低档!
5 大部分绝缘材料,特别是防静电材料的电阻值在加电压后会有一定变化而引起数字变化
由于本仪器的分辩率很高,因而会引起显示值的末尾几位数也变化,这不是仪器本身的问题,而是被测量对象的导电机理复杂而使得阻值有些变化。在这种情况下往往取2位有效数就够了。
6 接通电源后,手指不能触及高压线的金属部分
本仪表有二连根线:高压线(红)和微电流测试线。在使用时要注意高压线,开机后人不能触及高压线,以免电人或麻手。
7 测试过程中不能触摸微电流测试端
微电流测试端最怕受到大电流或人体感应电压及静电的冲击。所以在开机后和测试过程中不能与微电流测试端接触,以免损坏仪表。
8 在测量高阻时,应采用屏蔽盒将被测物体屏蔽.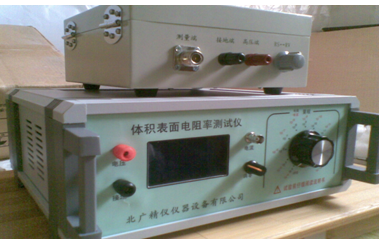
在测量大于1010 Ω以上时,为防止外界干扰面而引起读数不稳。
9 每次测量完时应将量程开关拨回“104 ”档再进行下次测试
在测量时应逐渐将量程开关拨到高阻档,测量完时应将电流电阻量程、电压量程开关拨回低档。以确保下次开机时量程开关处在低阻量程档。
Standard configuration:
1. Testing instrument: 1 unit
2. Power cord: 1
3. Measurement wires: 3 wires (shielded wire, test wire, grounding wire)
4. User manual: 1 copy
Note: This instrument, equipped with different measuring electrodes (fixtures), can measure the volume resistivity, surface resistivity, or conductivity of different materials (solid, powder, or liquid)
technical requirement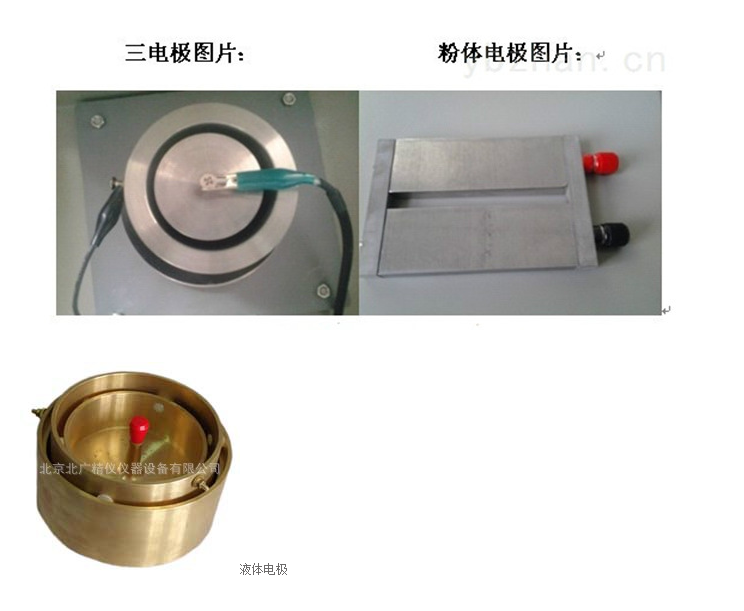
01 Resistance measurement range 1 ? 104 Ω~1 ? 1018 Ω
02 Current measurement range 2 ? 10-4A~1 ? 10-16A
03 Display Method: Digital LCD Display
04 Built in test voltage: 10V, 50V, 100V, 250, 500, 1000V (can be switched freely)
05 Basic accuracy 1% (* note)
06 Operating environment temperature: 0 ℃~40 ℃, relative humidity<80%
07 Power supply form AC 220V, 50HZ, power consumption about 5W
Instrument size: 285mm ? 245mm ? 120mm
The quality of the 09 instrument is about 5KG
10 instruments can work continuously for 8 hours
Typical applications
1. Measure the resistance (rate) of insulation materials
2. Measure the resistance and resistivity of anti-static materials
3. Measure the system resistance value of the raised floor used in the computer room
4. Measure the resistance value of anti-static shoes and conductive shoes
5. Measurement of Dark Current in Photodiodes
6. Physics, Optics, and Materials Research
Application scope:
A material high resistance test measurement, such as detecting the resistance value of anti-static products (anti-static shoes, anti-static plastic rubber products, computer room anti-static raised floor, etc.);
Measurement of material volume resistance (rate) and surface resistance (rate);
Electrochemical and material testing, as well as physics, optics, and materials research;
Weak current measurement such as photoelectric effect and device dark current measurement.
instructions
(1)The following requirements should be met:
1. The testing voltage range should include: 100V~500V
2. The measurement range should include: 1 ? 106 Ω~1 ? 1017 Ω
3. When the resistance value is greater than 1012 Ω, the measurement error should be less than ? 20%, and when the resistance value is not greater than 1012 Ω, the measurement error should be less than ? 10%.
4. The insulation resistance of the input wiring should be greater than 100 times the input resistance of the instrument.
5. The sample and measuring wire should be in good condition during testing.
6. The instrument should be calibrated regularly.
(2)Preparation work:
1. Take 50ml of the tested liquid (such as plasticizer) sample.
2. The sample should be treated for more than 2 hours under the conditions of a temperature of 23 ? 2 ℃ and a relative humidity of 65 ? 5%.
(3)Test steps:
1. The test is conducted in an environment with a temperature of 23 ? 2 ℃, a relative humidity of 65 ? 5%, and no external electromagnetic field interference.
2. When testing, apply a DC voltage of 100V~500V to the sample and select the voltage level.
3. Pour the sample into the high-voltage electrode until the liquid level is in full contact with the lower edge of the ring electrode.
4. Connect the fully discharged sample and electrode according to the requirements of the solid (liquid) volume and surface resistivity tester.
Connect the external electrode (high-voltage electrode) to the high-voltage output terminal of the high solid (liquid) volume and surface resistivity tester.
The inner electrode (measuring electrode) is connected to the measuring end of the solid (liquid) volume and surface resistivity tester.
Connect the middle electrode (ring electrode) to the grounding terminal of the solid (liquid) volume and surface resistivity tester.
5. Preheat the instrument for 30 minutes, adjust the instrument (zero) after stabilization, add 1 minute of test, read the resistance indication value, discharge for 1 minute, and then test again, taking the arithmetic mean of the two times as the resistance indication value of the test sample.
(4)Calculation method:
Calculate the volume resistance coefficient (pv) according to equation (1), and take the two significant digits of the calculation result.
(5)Attention:
1. The measuring electrode must be placed on a highly insulated pad.
2. Before and after testing, the electrodes should be cleaned properly, especially the supporting parts of the three electrodes should not be contaminated by the sample
Precautions for use
High resistance measurement must be strictly carried out according to the usage method steps, otherwise it may cause permanent damage to the instrument or electric shock.
1. Zero should be adjusted when the "Rx" ends are open circuited (when the host is turned on)
If connected to a resistance box or the object being measured, zeroing the measurement will result in significant errors. Generally, after one zeroing, there is no need to zero again during the testing process, but resetting may be necessary after changing the measured voltage.
2. It is prohibited to short-circuit the "Rx" terminals to prevent the microcurrent amplifier from being impacted by high currents
Do not arbitrarily change the measured voltage during the testing process,
Randomly changing the measured voltage may damage the tested device or instrument due to excessive voltage or current, and some materials are nonlinear, meaning that voltage and current do not conform to Ohm's law. When changing the voltage, the measured resistance will also change because the current does not change linearly.
During measurement, gradually shift from low gear to high gear
Pause for 1-2 seconds each time to observe the displayed number. When there is a display value, stop and record the current number as the measured resistance value. If "1" is displayed, it indicates that the underrange should be shifted to higher gears. Until there are displayed numbers. When there are displayed numbers, do not dial to higher gears, otherwise it may damage the instrument (there is an overcurrent protection circuit inside the machine). Except for the 104 Ω gear, when the display is below 1.99, it indicates that the overtravel should be shifted to a lower gear!
The resistance value of most insulation materials, especially anti-static materials, will change to some extent after applying voltage, causing numerical changes
Due to the high resolution of this instrument, the last few digits of the displayed value may also change. This is not a problem with the instrument itself, but rather due to the complex conductivity mechanism of the measured object, which causes some changes in the resistance value. In this case, taking 2 significant digits is often sufficient.
After connecting the power supply, fingers should not touch the metal part of the high-voltage line
This instrument has two connecting wires: the high-voltage wire (red) and the microcurrent testing wire. When using, pay attention to the high-voltage wires. After turning on the machine, do not touch the high-voltage wires to avoid electric shock or numbness.
During the testing process, do not touch the microcurrent testing terminal
The microcurrent testing end is most afraid of being impacted by high currents, human induced voltages, and static electricity. Therefore, it is not allowed to come into contact with the microcurrent testing terminal after startup and during testing to avoid damaging the instrument.
When measuring high resistance, a shielding box should be used to shield the object being measured
To prevent unstable readings caused by external interference when measuring above 1010 Ω.
After each measurement, the range switch should be turned back to the "104" position before conducting the next test
During measurement, the range switch should be gradually turned to the high resistance range. After measurement, the current resistance range and voltage range switches should be turned back to the low range. To ensure that the range switch is in the low resistance range range mode during the next startup.
北广精仪公司电性能及橡胶塑料相关产品:
BWN拉力材料试验机(符合国标GB/T1172-1999、GB/T2975-1998、GB/T10632-1989)
BDJC-10KV-200KV电压击穿试验仪(符合国标GB1408-2006、GB/T1695-2005、GB/T3333、HG/T 3330、GB12656、ASTM D149)
BEST-121体积表面电阻率测定仪(符合国标GB/T 1410、2439、10581、1692、12703.4、10064、ASTM D257-99)
BQYH-96塑料球压痕硬度计(符合国标GB/T3398-2008)
BEST-19导体材料电阻率测试仪
M-200橡胶塑料滑动摩擦试验机(国标,非国标,可定制)
GDAT-A介电常数介质损耗测试仪(可测试固体液体
BQS-37A高频介电常数介质损耗测试仪
BDH-20KV绝缘材料耐电弧性能试验仪/高电压小电流测试仪
BWK-300A液显热变形维卡软化点温度测定仪
BQYH-96塑料球压痕硬度计
BRT-400Z熔体流动速率测定仪/熔融指数仪
BMD-A计算机控制马丁耐
HMYX-2000海绵泡沫压陷硬度测定仪
HMLQ-500海绵泡沫落球回弹仪
HMPL-2000海绵泡沫疲劳冲击测定仪
HMLS-1000海绵拉伸强度试验机
HMYS-200海绵压缩永久变形试验机
HMMD-A海绵密度测定仪
JF-3氧指数测定仪
XCY-III低温脆性试验机
BLD-600V漏电起痕试验仪
BLD-6000V高压漏电起痕试验仪
BLC-2000落球冲击试验机
BLB-30管材落镖冲击试验机
BCM-03摆锤薄膜冲击试验机
CZF-5水平垂直燃烧试验仪
BZR-A汽车内饰材料阻燃性能试验机
BYL-01哑铃制样机
BJ-50简支梁冲击试验机
BX-50悬臂梁冲击试验机
BM-201门尼粘度试验机
BL-200无转子硫化仪
cp-s冲片机手动
cp-q气动冲片机
业务咨询:932174181 媒体合作:2279387437 24小时服务热线:15136468001 盘古机械网 - 全面、科学的机械行业免费发布信息网站 Copyright 2017 PGJXO.COM 豫ICP备12019803号