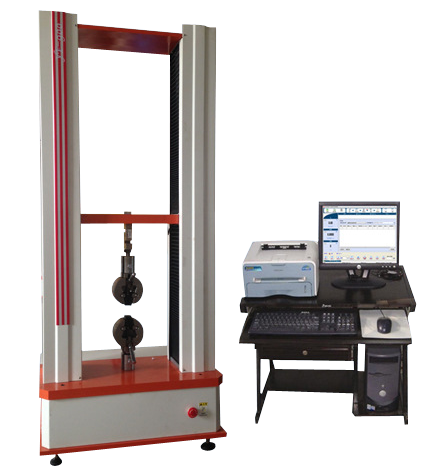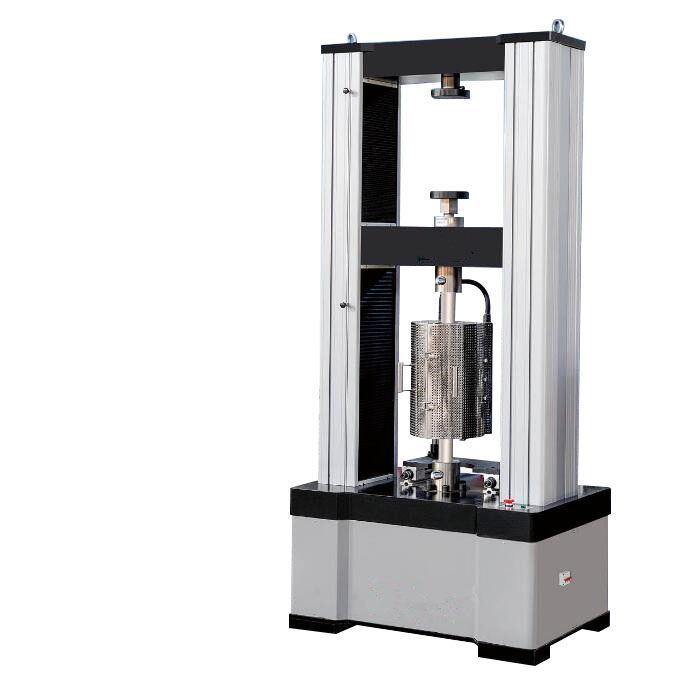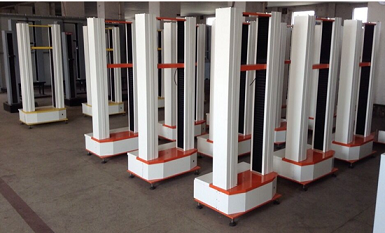
传送带拉力机 产品涵盖了:汽车、五金、医疗、橡胶、塑料、皮革、包装、电线电缆、纸张、管材、婴儿用品、运动器材等金属与非金属材料行业的多种品质检测仪器。与各质量技术监督所、SGS、T?V,ITS,BV,UL-STR橡胶设计院、电缆研究所、航天航空科技大学、大专院校、科研院所等科研单位建立了良好的合作关系。多年来公司一直坚持科研与生产相结合,及时掌握国内外检测设备的最新信息。
传送带拉力机 维修保养方法及注意事项
1、机台部份,外表经常擦拭,保持清洁。
2、电镀部份请以机油擦拭,以防止生锈宜保光亮。
3、动力螺杆及螺杆部份请加润滑油,以保传动灵敏。(润滑油采黄油加入少许机油混合即可)。
4、面板(控制箱即显示器)请用乾布擦拭,严防沾水,以免损坏IC电子零件。
5、各项治具及接头配件请妥置,并擦拭防锈油,以防生锈。
6、上下班必需把电源关掉。
维护与保养
1轴承内的润滑脂一般3—5年更换一次。
2 试验机应每年请当地计量部门检定一次。
结构特征及工作原理
本机由机械、电气二大部分组成。
1机械部分结构及工作原理:
本机采用电动加载方式,底部是整机结构承载支架,内部包含有电机驱动器、加载电机、减速机构、动力传动机构等部件;上部是试样夹持及力值、位移测量机构,包含有试样拉伸夹具、测力传感器、位移传感器等主要部件。
2 电气部分:
电气部分由显示测量控制部分组成。显示测量控制部分实现各种控制、显示、数据采集、处理等功能。软件部分的操作请仔细阅读《软件说明书》。
3 本机的几项主要功能:
3.1 全开放性参数设置
3.2 设置参数保存
3.3 浮动零点设置,可随时调整零点
3.4 峰值保持及存储,常值跟随;
3.5 在有效速度范围内,速度值任意设置;
3.6 横梁移动过程中的速度快捷切换功能
3.7 灵活的数据查询显示功能;
3.8 过载停机保护功能;
3.9 试验结束自动判断功能;
3.10 极限位置保护等;
开关机注意事项:
1开机时主机和计算机的开机顺序会影响计算机的通讯初始化设置,所以务必请用户严格按照上述开机顺序进行。
2每次开机后要预热5分钟,待系统稳定后,才可进行试验工作。
3如果刚刚开机,需要再开机,至少保证1分钟的间隔时间。
4在更换夹具后,首先要注意调整好可调挡圈(上下限位开关)。
5尤其在用小力值传感器做试验时,一定要调整好可调挡圈的位置,以免操作失误而损坏小力值传感器。不要超过传感器的额定量程。
6任何时候都不能带电插拨电源线,否则很容易损坏电气控制部分。
7试验过程中,不能远离试验机。
8试验过程中,除停止按键和急停开关外,不要按控制盒上的其它按键,否则会影响试验。
9试验结束后,一定要关闭所有电源。
10本计算机是专门用于试验机控制和数据处理的,请勿在计算机内安装其它应用软件,以免试验机应用软件不能正常运行。
11计算机要严格按照系统要求一步一步退出,正常关机,否则会损坏部分程序,导致软件无法正常使用。
12不要使用来历不明或与本机无关的软盘在试验机控制用计算机上写盘或读盘,以免病毒感染。
性能特点:
微机控制电子万能试验机、采用国外先进设计理念,外形美观、操作方便、性能稳定可靠。计算机通过我公司研制的全数字控制系统进行采集控制、经全数字调速控制器直接控制全数字调速电机转动、电机转速经圆弧同步减速系统减速后传递给精密滚珠丝杠副实现横梁上升、下降,完成试样的拉伸、剥离、压缩等力学性能试验。
软件特点:
1、测试标准模块化功能:提供使用者设定所需应用的测试标准设定,范围涵盖GB、ASTM、DIN、JIS、BS…等测试标准规范。
2、试品资料:提供使用者设定所有试品数据,一次输入数据永久重复使用,并可自行增修公式以提高测试数据契合性。
3、 双报表编辑:完全开放式使用者编辑报表,供测试者选择自己喜好的报表格式(测试程序新增内建EXCEL报表编辑功能扩展了以往单一专业报表的格局) 。
4、 各长度、力量单位、显示位数采用动态互换方式,力量单位T、Kg、N、KN、5、lb,变形单位mm、cm、inch。
5、图形曲线尺度自动醉佳化Auto Scale,可使图形以醉佳尺度显示,并可于测试中实时图形动态切换。具有荷重-位移、荷重-时间、位移-时间、应力-应变荷重-2点延伸图,以及多曲线对比。
6、测试结果可以WORD、EXCEL格式的数据形式输出。
7、测试结束可自动存档、手动存档,测试完毕自动求算醉大力量、上、下屈服强度、滞后环法、逐步逼近法、非比例延伸强度、抗拉强度、抗压强度、任意点定伸长强度、任意点定负荷延伸、弹性模量、延伸率、剥离区间醉大值、醉小值、平均值、净能量、折返能量、总能量、弯曲模量、断点位移x%荷重、断点荷重X%位移、等等。
8、数据备份:测试数据可保存在任意硬盘分区。
9、软件具有历史撕裂强度测试数据演示功能。

The products cover a variety of quality testing instruments in metal and non-metallic material industries such as automobile, hardware, medical, rubber, plastic, leather, packaging, wire and cable, paper, pipe, baby products, sports equipment, etc. It has established a good cooperative relationship with various quality and technical supervision institutes, SGS, T ? V, ITS, BV, UL-STR Rubber Design Institute, Cable Research Institute, University of Aerospace Science and Technology, colleges and universities, scientific research institutes and other scientific research institutions. For many years, the company has always adhered to the combination of scientific research and production, and timely grasped the latest information of domestic and foreign testing equipment.
Maintenance methods and precautions
1. The surface of the machine shall be wiped frequently to keep it clean.
2. Please wipe the electroplating part with engine oil to prevent rust and keep it bright.
3. Please add lubricating oil to the power screw and screw to ensure sensitive transmission. (The lubricating oil shall be mixed with a little oil by using butter).
4. Please wipe the panel (control box or display) with a dry cloth to avoid water contamination, so as not to damage the IC electronic parts.
5. All fixtures and fittings of joints shall be properly placed, and anti rust oil shall be wiped to prevent rust.
6. Turn off the power when commuting.
Maintenance
1 The lubricating grease in the bearing is generally replaced every 3-5 years.
2 The testing machine shall be verified by the local metrological department once a year.
Structural features and working principle
This machine is composed of mechanical and electrical parts.
1 Mechanical structure and working principle:
This machine adopts the electric loading mode. The bottom is the bearing bracket of the whole machine structure, and the internal part includes the motor driver, loading motor, reduction mechanism, power transmission mechanism and other components; The upper part is the sample clamping and force value and displacement measuring mechanism, including the sample tensile clamp, force measuring sensor, displacement sensor and other major components.
2 Electrical part:
The electrical part consists of the display, measurement and control part. The display measurement control part realizes various functions such as control, display, data acquisition and processing. Please read the Software Manual carefully for software operation.
3 Main functions of the machine:
3.1 Fully open parameter setting
3.2 Saving of setting parameters
3.3 Floating zero point setting, which can be adjusted at any time
3.4 Peak holding and storage, constant value following;
3.5 Within the effective speed range, the speed value can be set arbitrarily;
3.6 Fast speed switching function during beam movement
3.7 Flexible data query and display function;
3.8 Overload shutdown protection function;
3.9 Automatic judgment function after test;
3.10 Limit position protection, etc;
Precautions for switching on/off:
1 The startup sequence of the host and the computer during startup will affect the communication initialization settings of the computer, so you must strictly follow the above startup sequence.
2 Warm up for 5 minutes after each startup, and conduct the test after the system is stable.
3 If the machine has just been started, it needs to be restarted, and the interval time should be at least 1 minute.
4 After the fixture is replaced, the adjustable retaining ring (upper and lower limit switches) shall be adjusted.
5 Especially when using small force sensor for test, be sure to adjust the position of adjustable retainer ring to avoid damage to small force sensor due to misoperation. Do not exceed the rated range of the sensor.
6 Never plug or unplug the power cord with electricity, otherwise the electrical control part will be easily damaged.
7 Keep away from the testing machine during the test.
8 During the test, except for the stop button and emergency stop switch, do not press other buttons on the control box, otherwise the test will be affected.
9 After the test, be sure to turn off all power supplies.
10 This computer is specially used for the control and data processing of the testing machine. Please do not install other application software in the computer to prevent the application software of the testing machine from working normally.
11 The computer should exit step by step in strict accordance with the system requirements and shut down normally, otherwise it will damage some programs and cause the software can not be used normally.
12 Do not use floppy disks of unknown origin or unrelated to this machine to write or read disks on the control computer of the testing machine to avoid virus infection.
Performance characteristics:
The microcomputer controlled electronic universal testing machine adopts advanced foreign design concepts, with beautiful appearance, convenient operation and stable and reliable performance. The computer conducts acquisition and control through the full digital control system developed by our company, directly controls the rotation of the full digital speed regulating motor through the full digital speed regulating controller, and the motor speed is transmitted to the precision ball screw pair after being decelerated by the arc synchronous deceleration system to achieve the rise and fall of the beam, completing the tensile, stripping, compression and other mechanical property tests of the sample.
Software features:
1. Modular function of test standard: provide the test standard settings required by user settings, covering GB, ASTM, DIN, JIS, BS and other test standards and specifications.
2. Test object data: provide the user with all test object data set, input data once for permanent reuse, and self repair formula to improve the compatibility of test data.
3. Double report editing: completely open users can edit reports for testers to choose their preferred report format (the built-in EXCEL report editing function added to the test program expands the previous pattern of single professional reports).
4. Each length, force unit and display digit are dynamically interchangeable. The force units are T, Kg, N, KN, 5, lb, and the deformation units are mm, cm, and inch.
5. The graph curve scale is automatically optimized to Auto Scale, which enables the graph to be displayed in a better scale, and can be dynamically switched in real time during testing. It has load displacement, load time, displacement time, stress strain load 2-point extension diagram and multi curve comparison.
6. The test results can be output in WORD and EXCEL formats.
7. After the test, it can be archived automatically or manually. After the test, it can automatically calculate the maximum strength, upper and lower yield strength, hysteresis loop method, gradual approximation method, non proportional extension strength, tensile strength, compressive strength, constant elongation strength at any point, constant load extension at any point, elastic modulus, elongation, maximum value, minimum value, average value, net energy, return energy, total energy, bending modulus Breaking point displacement x% load, breaking point load X% displacement, etc.
8. Data backup: test data can be saved in any hard disk partition.
9. The software has the function of demonstrating historical tear strength test data.
业务咨询:932174181 媒体合作:2279387437 24小时服务热线:15136468001 盘古机械网 - 全面、科学的机械行业免费发布信息网站 Copyright 2017 PGJXO.COM 豫ICP备12019803号